Quarkus is a powerful enterprise programming stack that has very high possibilities to take the market by storm. It’s possible to create supersonic and subatomic applications with Java, therefore we can create ultra-fast applications for Serverless.
In the cloud era, we need speed and light-weight applications, Quarkus makes it possible masterfully. To start a Java application with Quarkus, it takes less than 500 milliseconds.
Quick-Starting your Quarkus Application
To quick-start with Quarkus, we can use the following URL code.quakus.io and generate our application there.
I won’t go deep into the process of the Docker installation but I will mention the links here where you can learn how to install Docker on your machine.
For MacBook, you can use the following link to install Docker: docker-for-mac-install
If you are using Windows, you can access the following link: docker-for-windows-install
If you want Docker for Ubuntu, you can use the following link: docker-engine-install-ubuntu
If you need to install Docker for another Linux distribution, simply explore the official Docker website.
Also, since we will be using docker-compose in our application, it’s necessary to install docker-compose. You can access the following link: docker-compose-install
Simply put, docker-compose is a way to use docker in one simple command docker-compose up to start your service or docker-compose down to destroy it.
Instead of using docker run to start services we need, we will use docker-compose so that we don’t need to create an extended docker run command.
You need to have the Java SDK 11 and Gradle installed on your machine before starting this tutorial.
Quarkus has an incredible platform with many powerful libraries to help us create reliable and robust software in the cloud. In this platform, we can easily choose and create our project in the way we want.
Go to the following link, code.quarkus.io, and let’s create our simple project.
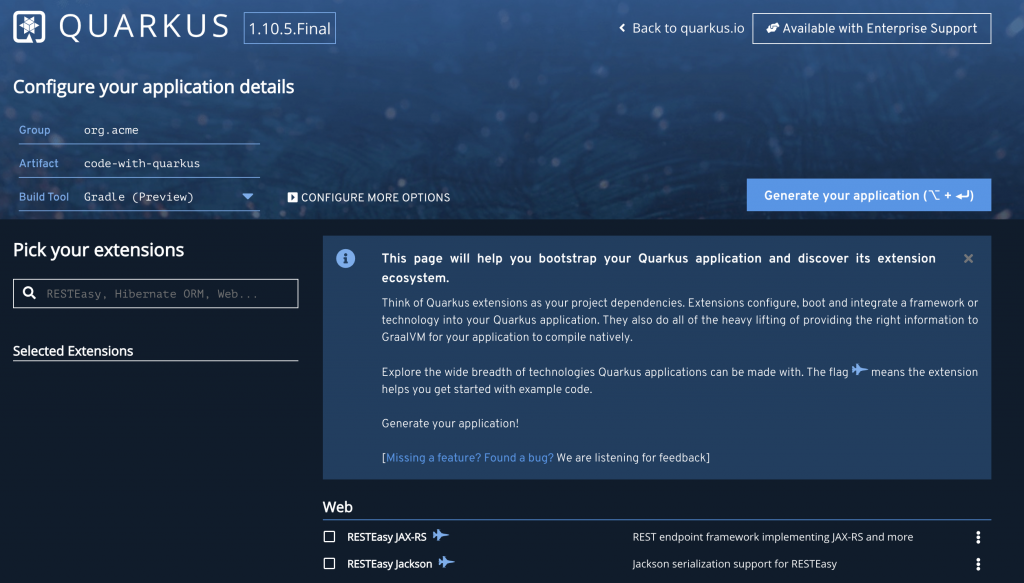
This is the platform where we can quick-start our Quarkus project:
In the “Pick your extensions” section, we will add the following dependencies to our project:
MongoDB with Panache RESTEasy JSON-B RESTEasy Jackson SmallRye Health
In the Build Tool option, select Gradle.
After picking what we want for our project, let’s click on “Generate your application”. Unzip the project and import it to your favorite IDE (mine is IntelliJ).
Docker is a very powerful technology to isolate environments and make the software deploy portable to anywhere. This is very useful in the cloud era, we don’t depend on any operating system to run our application since Docker isolates everything we need. Also with Docker, there is not such a problem as “it doesn’t work on my machine” because environments can be completely replicated.
Let’s now use Docker to start our MongoDB sessions!
Now create the docker-compose.yml file in the root of our Quarkus project with the following information.
   version: '3.7'
      services:
      mongodb_container:
      image: mongo:latest
      ports:
      - 27017:27017
      volumes:
      - mongodb_data_container:/data/db

      volumes:
      mongodb_data_container:
Then start the MongoDB session by running the following command in the root of the Quarkus project:
docker-compose up
In the following code, we will:
1 – Configure the project to connect to MongoDB 2 – Create the Knight model class with the fields we want, extending the PanacheMongoEntity class. 3 – Create our data Repository with customized search methods such as count, orderedByName, and searchByName. 4 – Create the REST endpoints to create, update, delete, and search Knights.
Once we are running a Docker MongoDB instance, then we can configure our Quarkus application to connect to it. Let’s then create the application.properties file in the following path: “src/main/resources/”.
In this file, we are essentially setting up the MongoDB host and the database name which should be enough to integrate Quarkus with MongoDB!
# configure the MongoDB client for a single node cluster on localhost
quarkus.mongodb.connection-string=mongodb://localhost:27017
# mandatory if you don't specify the name of the database using @MongoEntity
quarkus.mongodb.database=knight
...
With Panache, it’s really easy to deal with database transactions. We can simply create our database configuration in a property file, create our Repository class, and voilàwe are already manipulating information with a database. With Panache, we have two main implementation choices, we can either create our database interaction through the model class or we can create use of the Repository pattern.
In this example, we will use the Repository pattern since, in my opinion, we can organize the code better.
Firstly, let’s create our Knight model class:
import io.quarkus.mongodb.panache.PanacheMongoEntity;

public class Knight extends PanacheMongoEntity {

    public String name;
    public String swordName;

    public Knight() { }

    public Knight(String name, String swordName) {
        this.name = name;
        this.swordName = swordName;
    }
}
Then, let’s create the Repository class that will extend the PanacheMongoRepository responsible for giving us essential database operations, such as create, update, delete, and search elements.
import io.quarkus.mongodb.panache.PanacheMongoRepository;
import io.quarkus.panache.common.Sort;
import java.util.List;
import javax.enterprise.context.ApplicationScoped;

@ApplicationScoped
public class KnightRepository implements PanacheMongoRepository{

    public Knight findByName(String name){
        return find("name", name).firstResult();
    }

    public List findOrderedByName(){
        return findAll(Sort.by("name")).list();
    }

}
Finally, let’s create the endpoints to expose our Knight services so that we can invoke them via HTTP requests:
import java.util.List;
import javax.inject.Inject;
import javax.ws.rs.DELETE;
import javax.ws.rs.GET;
import javax.ws.rs.POST;
import javax.ws.rs.PUT;
import javax.ws.rs.Path;
import javax.ws.rs.PathParam;
import javax.ws.rs.core.Response;
import org.bson.types.ObjectId;

@Path("/knights")
public class KnightResource {

    private KnightRepository knightRepository;

    @Inject
    public KnightResource(KnightRepository knightRepository) {
        this.knightRepository = knightRepository;
    }

    @POST
    public Response create(Knight knight) {
        knightRepository.persist(knight);
        return Response.status(Response.Status.CREATED).build();
    }

    @PUT
    @Path("/{id}")
    public void update(@PathParam("id") String id, Knight knight) {
        knight.id = new ObjectId(id);
        knightRepository.update(knight);
    }

    @DELETE
    @Path("/{id}")
    public void delete(@PathParam("id") String id) {
        Knight knight = knightRepository.findById(new ObjectId(id));
        knightRepository.delete(knight);
    }

    @GET
    @Path("/{id}")
    public Knight get(@PathParam("id") String id) {
        return knightRepository.findById(new ObjectId(id));
    }

    @GET
    public List<Knight> list() {
        return knightRepository.listAll();
    }

    @GET
    @Path("/orderedByName")
    public List<Knight> listAllOrderedByName() {
        return knightRepository.findOrderedByName();
    }

    @GET
    @Path("/search/{name}")
    public Knight search(@PathParam("name") String name) {
        return knightRepository.findByName(name);
    }

    @GET
    @Path("/count")
    public Long count() {
        return knightRepository.count();
    }

}
Now that you have everything configured for your Quarkus application, you need to run your application. One of the most powerful features from Quarkus is the possibility to run your application in dev mode which allows us to change code and see real-time changes without having to restart the server!
To run Quarkus in dev mode using gradle we can use the following command in the root path from the project:
./gradlew quarkusDev
In simple words, Postman is a handy tool to facilitate the invocation of a service endpoint. We could invoke our endpoint using the command-line curl too but we have some nice features in Postman. It’s possible to organize our endpoint invocations for example.
To download or use Postman on the web, go to the following link: postman-downloads
To save a knight via Postman you can make your REST endpoint invocation in the following way:
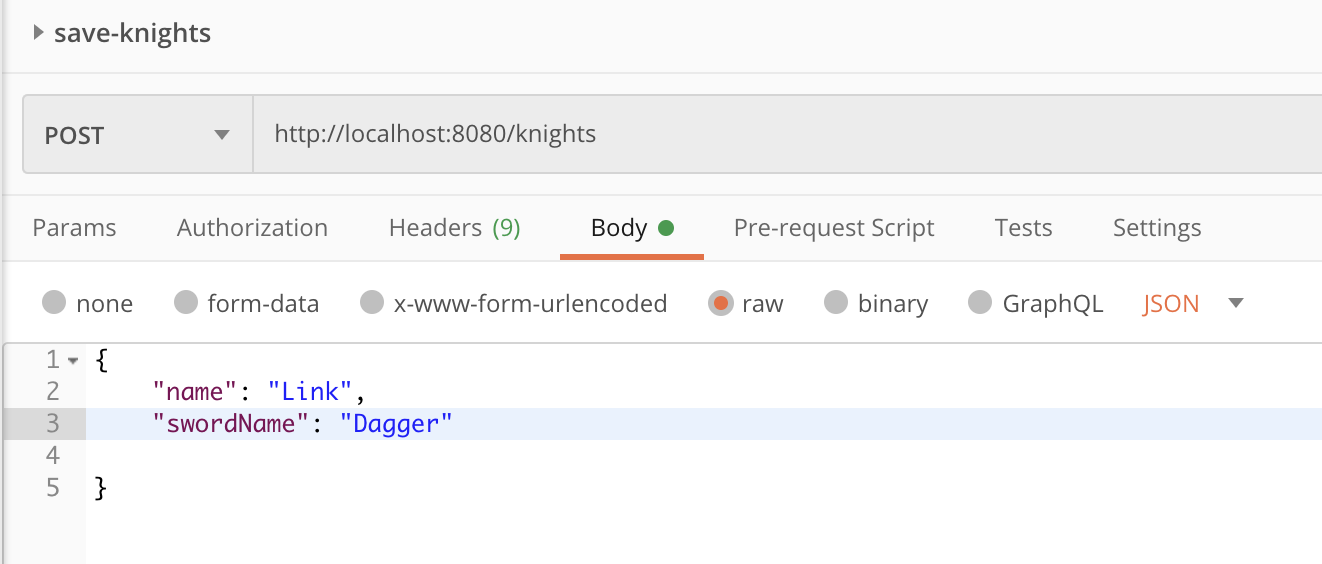
The other endpoints are similar and you can import the invocations to your Postman in the following link: quarkus-tests.postman_collection.json
That’s it for this article! It’s an introduction to how to create your Quarkus microservice with a MongoDB interaction. You can refine this application and practice your skills now!
The full code of this tutorial is in the following link: quarkus-mongodb-panache-code
Don’t hesitate to leave a comment in case you struggle in any part of this tutorial, I will respond to you as soon as possible.
Stay constantly breaking your limits!